Getting Started
Welcome to the world of pepper growing! At Pepper Joe's, we're committed to equipping you with everything you need to succeed in germinating the pepper seeds you've chosen. It's also our mission to introduce you to a large selection of exciting pepper varieties that will make for a very rewarding gardening experience. Let's dive into the germination steps together!
What is Germination?
The germination process is when a seed grows into a plant. This process happens indoors in a controllable environment. It is best to start this process when the climate gets warmer. Once you start the germination process, you won't be able to wait around for warmer weather once your plants are ready to be transplanted.
The best time to start germinating plants indoors is about four weeks before the last frost date. Of course, the time frame is dependent on which planting zone you are in, so make sure to track the last frost date in your area. If you aren't sure what planting zone you are in, check out our Planting Zones Blog for more information.

Steps for Pepper Seed Germination Using the Soil and Tray Method
Supplies for Pepper Seed Germination
- Water
- Seed Starting Soil Mix of Choice (note that seed starting mix is different than potting soil. It has lighter, airier characteristics that make it ideal for seed germination).
- Seed Germination Tray, Humidity Dome, Heat Mat, Temperature Controller, & Plant Light
- Plant Labels
- #2 Pencil
- Gloves (this is optional, but if you're dealing with super-hot peppers hot oil may still be on the seed).

How to Plant Pepper Seeds
#1. Pre-saturate your seed starting soil mix
This can be achieved by mixing your seed starting mix and water in a bucket or tub before filling your seed cell insert. Or, you can fill your seed cells up fully with dry seed starting mix then add about 6 cups of water to the watertight base tray prior to placing the seed cell insert into the tray.
There are many good seed starting mixes available at nurseries. They work very well and they don't require mixing or measuring. If you prefer to make your own mixture, we recommend you go with 1/3 good garden soil (don't go with clay soil as it compacts badly), 1/3 composted cow manure or similar growing medium, and 1/3 sand. Hot pepper plants love sand as many varieties originate in areas with sandy soil. Also, it provides excellent drainage. Mix all 3 ingredients together very well.
*Whichever method you use, the key is to ensure the seed starting mix is fully saturated before planting your seed.
#2. Make a ¼-inch hole in the center of each seed starting cell
A #2 pencil eraser is a great tool for making these holes.
#3. Place your seed into the ¼-inch hole and cover gently with soil

#4. Place your seedling heat mat under the bottom of your base tray and place your humidity dome on top
For best results, we recommend setting your temperature controller between 75 and 80 degrees.
#5. Place your plant light above the seed starting tray and turn it on
Special Note: We include easy-to-follow germination instructions with every seed order. Some seeds, especially the super hots, can be a bit tricky to germinate. We're aware that there might be other ways to get your seeds to sprout, but if you decide to try a different method than the one we suggest, please understand that we can't guarantee successful germination, and we won't be able to provide replacements.
Ongoing Steps for Pepper Seed Germination
Check on your seeds daily to ensure the soil remains moist but not soaked. After the initial pre-soaking, they likely won't need water for several days.
When additional water is needed, it's best to carefully lift the seed cell insert and pour a few inches of water into the base tray, allowing the soil in the cells to wick up the water. If the top of the soil still appears dry after a few hours you can also mist the top of the soil with a spray bottle.
Some seed varieties can be finicky and difficult to germinate. Be patient as hot pepper varieties can take 4 to 6 weeks to germinate. Others can show up in 7 to 10 days. It all depends on temperature, moisture, soil, and pepper variety.

Post-Germination Steps
Once at least 50% or more of the seeds germinate, you can remove the humidity dome. Once the dome is removed, the soil will start to dry out quicker than it did when on. At this time, it is beneficial to direct a small fan towards your seedlings to provide gentle airflow that will strengthen seedling stems.
If seedling stems appear to be growing weak and flimsy (AKA "leggy") you should move your grow light closer to the seedlings. If seedling leaves begin turning a dark purple or black color, your light should be moved higher.
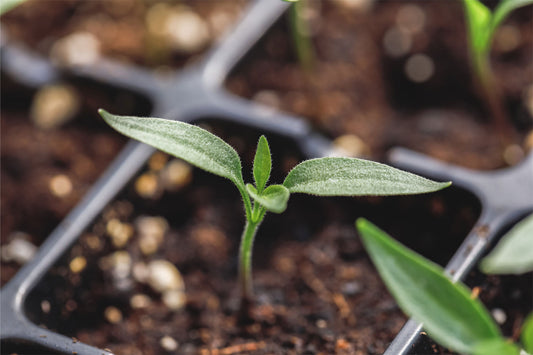
If multiple seedlings emerge in a single seed cell, you'll need to remove all but the healthiest seedling to prevent overcrowding and root tangling.
Pepper seeds contain all the nutrients they need for healthy initial growth. There is no need to fertilize your seedlings until they develop 4 to 6 "true leaves" and are several inches tall. At this point, you can begin using fertilizer at quarter-strength, slowly increasing fertilizer strength as they grow. Yellowing leaves are a sign that plants are lacking fertilizer, but note that yellowing can also occur when plants are being overwatered.
Once you have healthy seedlings with at least 6 true leaves, you're ready to move on to the hardening-off and transplanting stage.

Final Thoughts on Growing Hot Peppers
The journey of growing hot peppers can be a process that requires some patience, but the reward of your hard work will be truly satisfying. We’ve been through it, and we enjoy helping the most amazing community: the hot pepper community. If you have any questions, make sure to send us an email or connect with us on social media.


